


Key Takeaways
- Hardwood absorbs and releases moisture, so boards naturally expand and shrink as indoor conditions change.
- Keeping humidity relatively steady can help reduce cupping, crowning, gaps, cracking, and finish damage.
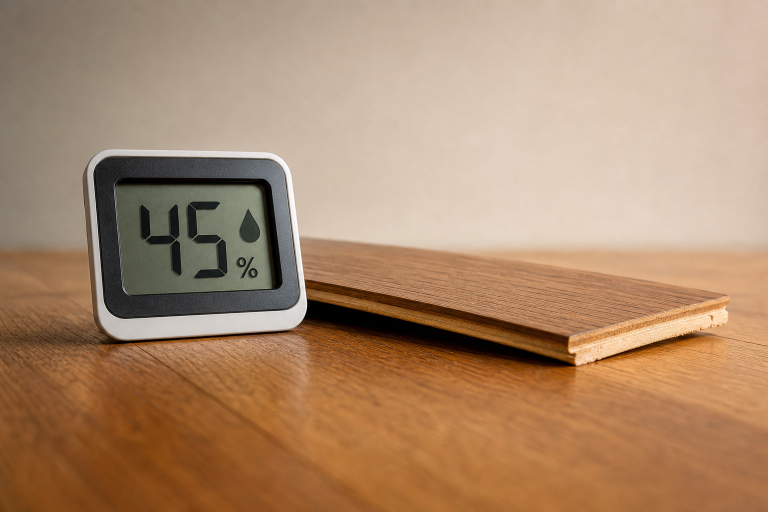
- A small hygrometer gives homeowners a simple way to monitor relative humidity throughout the year.
- Acclimation, subfloor moisture testing, and proper expansion spacing are essential before installation.
- Early attention to leaks, raised boards, dark marks, and new gaps can prevent more extensive repairs.
Hardwood flooring brings warmth, character, and long-term value to a home, but it also responds to its environment. Whether you are planning Hardwood Floor Installation or caring for floors that have been in place for years, understanding moisture is one of the most important parts of protecting the wood.
Wood is hygroscopic, meaning it takes in and gives off moisture from the surrounding air. When the air becomes more humid, boards can swell. When indoor air becomes very dry, boards can contract. Some seasonal movement is normal, but repeated or extreme swings can affect the appearance, fit, and durability of a floor.
Why Humidity Matters to Hardwood Flooring
Hardwood does not stop reacting to moisture after it is milled into flooring. Changes in relative humidity can alter the moisture content of the boards and, in turn, their dimensions. This movement may be subtle in a stable home, but it becomes more noticeable when heating systems dry the air in winter or when summer moisture enters through open windows, damp basements, and poor ventilation.
For most homes, indoor relative humidity around 30% to 50% is a practical target. However, the flooring manufacturer’s written recommendations should always take priority because wood species, board width, construction, and finish systems vary. Review these recommended humidity levels for hardwood floors and use a hygrometer in several areas of the home, especially near exterior doors, kitchens, and lower levels.
What Excess Moisture Can Do
High humidity or direct water exposure can cause boards to expand. One common result is cupping, where the edges of a board rise higher than its center. Cupping can occur when moisture comes from beneath the floor, such as a damp crawl space, wet basement, or subfloor issue.
More serious swelling can lead to buckling, where the flooring lifts or separates from the subfloor. Moisture problems often begin near plumbing fixtures, dishwashers, exterior walls, entry doors, bathrooms, and below-grade spaces.
Common causes include slow leaks, wet mopping, pet accidents, condensation, blocked gutters, and inadequate ventilation.
What Dry Air Can Do
Low humidity is also hard on hardwood. As boards lose moisture, they shrink and may form visible gaps between planks. Dry conditions can also contribute to cracking, splitting, squeaks, loose joints, and a finish that appears stressed at board edges.
Small seasonal gaps sometimes close when humidity rises again. Larger, persistent, or sudden gaps deserve closer attention. Check whether a furnace, fireplace, or forced-air system is drying the home excessively, and maintain a humidifier according to its instructions if dry air is the likely cause.
Seasonal Hardwood Care for 2026
- Winter: Watch for gaps and dry air caused by heating systems. Keep indoor temperatures and humidity as consistent as possible.
- Spring: Inspect for plumbing leaks, condensation, wet foundation walls, and crawl-space moisture after seasonal rain.
- Summer: Use air conditioning or dehumidification when indoor humidity climbs, especially in humid climates.
- Fall: Check door thresholds, vents, transitions, and weatherstripping before the heating season begins.
Signs That a Floor Needs Attention
- Raised, uneven, or soft-feeling boards underfoot.
- Edges that curl upward, or board centers that sit higher than the edges.
- New gaps that appear quickly or continue to widen.
- Dark staining near sinks, appliances, exterior doors, or plumbing fixtures.
- Peeling, cloudy, or separating finish.
- Persistent squeaks, movement, or loose boards.
Installation Choices That Reduce Moisture Problems
Good moisture control begins before the first board is installed. Flooring should acclimate to the home’s normal indoor conditions, while both the wood and subfloor should be tested for moisture. Installers also need appropriate expansion gaps around walls, cabinets, door frames, and other fixed objects.
The best installation method depends on the flooring product, subfloor material, room location, and site conditions. Solid hardwood, engineered hardwood, concrete slabs, and below-grade spaces have different requirements. Follow the manufacturer’s instructions rather than relying only on general rules of thumb.
Cleaning Habits That Protect the Finish
Dust and grit can scratch a finish, while standing water can create swelling and staining. Dry dust regularly or vacuum with a floor-safe attachment. For deeper cleaning, use a lightly damp microfiber mop and avoid leaving moisture behind. Clean spills, wet shoes, and pet accidents promptly.
Steam cleaning is best avoided unless the flooring manufacturer specifically permits it. Entry mats, furniture pads, and quick cleanup routines reduce both surface wear and the chance that water will sit along board seams.
When Refinishing May Help, and When It May Not
Refinishing can improve scratches, worn finish, dullness, and an outdated color. It will not correct an active leak, wet subfloor, severe cupping, or structural movement. Sanding too soon can make moisture-related distortion worse, particularly if cupped boards have not fully dried and stabilized.
Cosmetic or Structural?
- Likely cosmetic: Surface scratches, worn finish, minor discoloration, or a dated stain color.
- Needs moisture investigation first: Raised boards, spreading stains, soft areas, recurring cupping, or flooring that changes shape after rain or HVAC problems.
What Recent Flooring Coverage Says About Moisture Control
Recent homeowner coverage continues to emphasize the same practical priorities: monitor indoor conditions, identify the moisture source before repairing the floor, and plan installation around the home’s actual environment. This hardwood flooring moisture control guidance also highlights why prevention and early assessment are more useful than treating visible movement as only a cosmetic issue.
Common Questions Homeowners Ask
Can humidity damage engineered hardwood?
Yes. Engineered construction may offer improved dimensional stability, but it still needs appropriate humidity control and protection from liquid water.
Will a humidifier stop floor gaps?
It may help reduce gaps caused by overly dry air, but it cannot restore boards that are already cracked, split, or permanently damaged.
Can cupped boards flatten again?
Mild cupping may improve after the moisture source is corrected and the floor dries gradually. Severe or persistent movement should be assessed before repairs or refinishing begin.
Should hardwood be installed in a basement?
It depends on moisture testing, subfloor preparation, drainage, and the product’s approved installation conditions. Engineered flooring may be more appropriate in some below-grade spaces.
A Simple Monthly Maintenance Checklist
- Check indoor relative humidity and note major changes.
- Look for new gaps, raised edges, dark spots, or finish changes.
- Inspect around sinks, appliances, doors, vents, and exterior walls.
- Remove dust and grit before it can scratch the finish.
- Confirm that HVAC equipment, humidifiers, and dehumidifiers are operating correctly.
- Take photos when a new issue appears so changes are easier to track.
Conclusion
Hardwood flooring performs best when indoor conditions remain steady. By monitoring humidity, cleaning up moisture quickly, maintaining HVAC equipment, and responding early to warning signs, homeowners can help preserve both the appearance and service life of their floors.
When movement, staining, or moisture damage continues, review the flooring product instructions and seek a qualified assessment before attempting cosmetic repairs.